Back Office: User Management - Adding/Editing User/Employee Time Manually (Forced Punch In / Out)
Sign into the Back Office and select a Store.
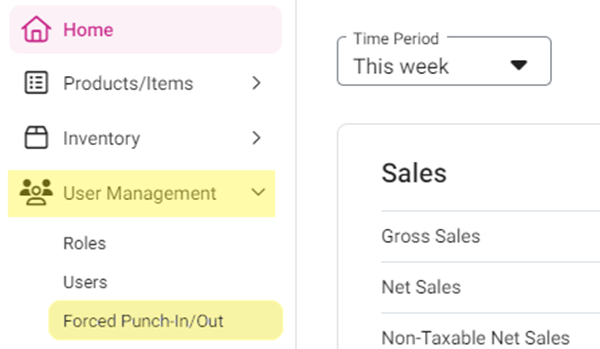
On the left-side Navigation Panel, click User Management then Forced Punch-In/Out.
On the Forced Punch-In/Out page:
To Log a New Punch In/Out Shift:
Click + Time Event. You’re taken to the Time Event page.
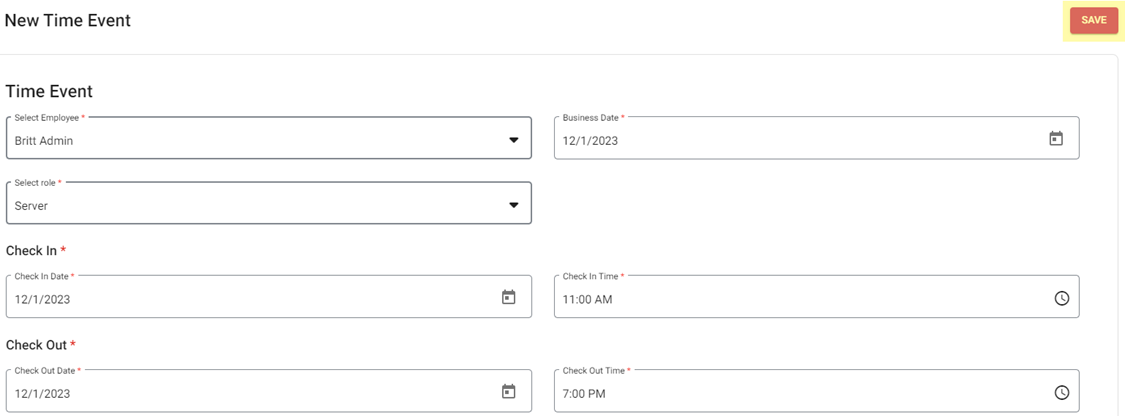
Under the Time Event section:
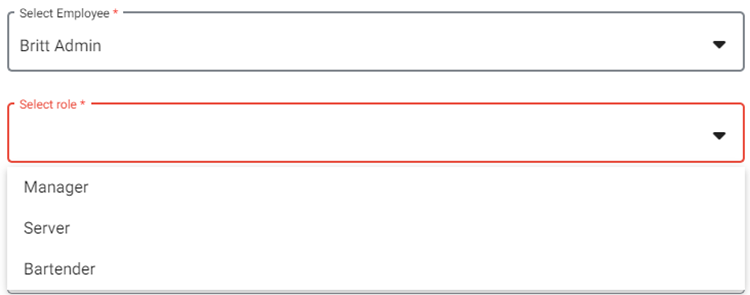
Select the Employee from the dropdown. You can search for the employee to quickly find them.

Select the Business Date (calendar view).
Select the Role (dropdown options are based on the roles available to the selected Employee).
Check In – select the Check In Date (Calendar view) and Check In Time (clock view).
Note: You cannot select a future date.

Check Out – select the Check Out Date (Calendar view) and Check Out Time (clock view).

When everything on the new Time Event is set, click Save at the top-right.
View the saved Time Event: select the Employee and Date at the top, then click Apply. The Time Event appears under Time Clock Log.
Tip: You can view any Employee’s Time Clock Log on a specific day by selecting their Name and the Date, then clicking Apply.

Related Articles
Back Office: User Management - Editing an Existing Employee/User
Sign into the Back Office and select a Store. On the left-side Navigation Panel, click User Management then Users. On the Users screen, under the Actions column click the ••• for a User then click Edit. When adding or editing a User, the following ...
Back Office: User Management - How to Add, Edit and Update Employee Roles
Sign into the Back Office and select a Store. On the left-side Navigation Panel, click User Management then select Roles. On the Roles page, click + New Role at the top-right. The New Role pane appears. You can update a Role by clicking the ...
Back Office: User Management - Employee Roles Description
Detailed information about each role in the User Management Role settings Backoffice: These settings control the settings that are programmed in the back office Gratuity – Changing the Gratuity setting Gift Card – Can access the gift card information ...
Back Office: User Management - How to add a New User/Employee
Sign into the Back Office. On the left-side Navigation Panel, click User Management then Users. On the Users screen: click + New User. The New User screen appears. When adding or editing a User, the following fields will be Mandatory: Name, Last ...
Back Office: User Management - Employee Tip Adjustment
Sign into the Back Office. On the left–side Navigation Panel, click User Management then Tip Adjustment. The Tip Adjustment page appears. Select the Billing Date and Employee Type, then click Apply. Billing Date Filter – Select the Billing Date ...