Back Office: Sales Recap Report Settings
- Sign into the Back Office.
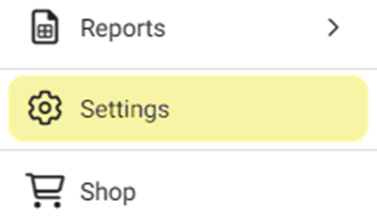
- On the left-side Navigation Panel, click Settings.
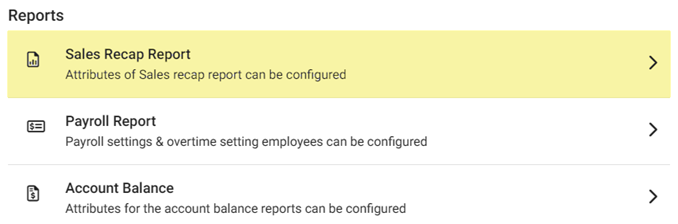
- On the Settings page, under Reports click Sales Recap Report.
- The Sales Recap Report page contains the following sections:
General
Guest/Checks – If Enabled (YES) any Guests/Checks will appear on the Sales Recap Report. If Disabled (NO), they won’t appear on the report.
Cover – The count of the specific Category/Subcategory/Menu Items that are used on that Business Date. If Enabled (YES), they will appear on the report. If Disabled (NO), they won’t appear on the report.
Level - If Enabled (YES), the Level field is shown, with Level Type and Category.
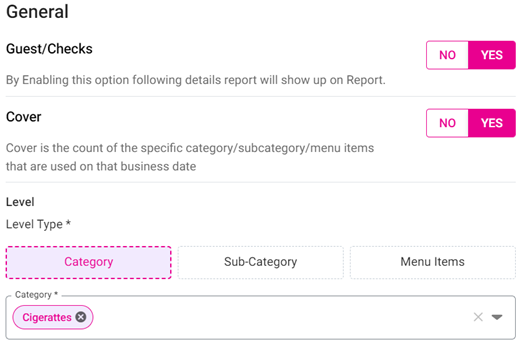
Level Type – Select Category, Subcategory, or Menu Item. The following dropdown is based upon this selection. Select one or more items from the second dropdown, or Select All. You can de-select an option if needed.
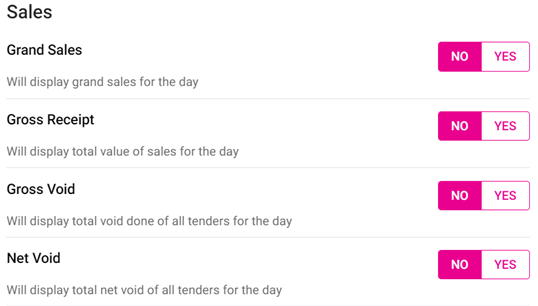
Sales
- Grand Sales – If Enabled (YES) the grand sales for the day will appear on the report. If Disabled (NO), they won’t appear on the report.
- Gross Receipt – If Enabled (YES) the total value of sales for the day will appear on the report. If Disabled (NO), they won’t appear on the report.
- Gross Void – If Enabled (YES) the Net Void done of all tenders of the day will appear on the report. If Disabled (NO), they won’t appear on the report.
- Net Void – If Enabled (YES) the Net Void of all tenders of the day will appear on the report. If Disabled (NO), they won’t appear on the report.
Payments
- CC Split Up – If Enabled (YES) the credit card sales with card type, count, and sale value will appear on the report. If Disabled (NO), they won’t appear on the report.
- Other Payments Split Up – If Enabled (YES) other mode payments aside from credit card will appear on the report. If Disabled (NO), they won’t appear on the report.
- Payment Name – If Enabled (YES), select how the mode names are defined (System Defined or User Defined). If Disabled (NO), they won’t appear on the report.

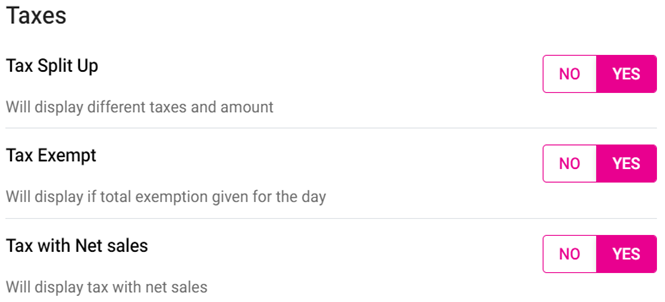
Taxes
- Tax Split Up – If Enabled (YES) the different taxes and amounts will appear on the report. If Disabled (NO), they won’t appear on the report.
- Tax Exempt – If Enabled (YES) the total exemption given for the day will appear on the report. If Disabled (NO), they won’t appear on the report.
- Tax with Net Sales – If Enabled (YES) the tax along with the net sales will appear on the report. If Disabled (NO), they won’t appear on the report.
Summary
Department Summary – If Enabled (YES), the amount submitted from cashier at the end of the day will appear on the report. If Disabled (NO), they won’t appear on the report.
Category Summary – If Enabled (YES), the amount submitted from cashier at the end of the day will appear on the report. If Disabled (NO), they won’t appear on the report.
Hourly Summary – If Enabled (YES), the amount submitted from cashier at the end of the day will appear on the report. If Disabled (NO), they won’t appear on the report.
Include Credits in Daily Summary Report – If Enabled (YES), the amount submitted from cashier at the end of the day will appear on the report. If Disabled (NO), they won’t appear on the report.
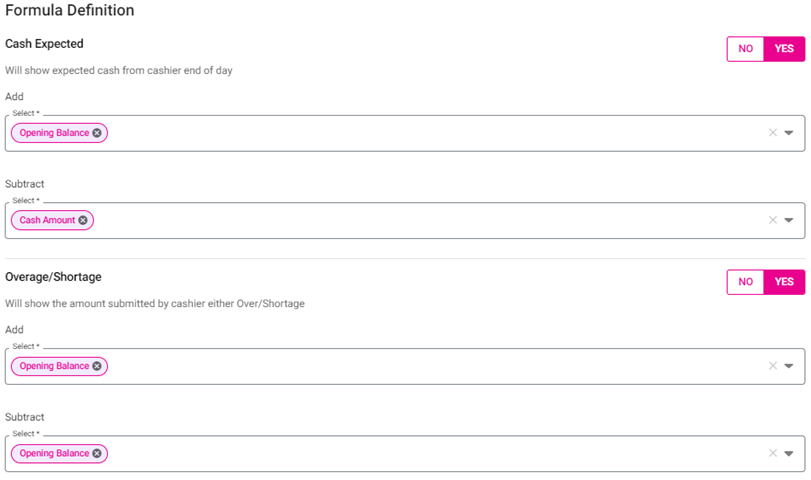
Cash Expected – If Enabled (YES), the expected cash from cashier at the end of the day will appear on the report. Select one or more options (or Select All) from the Add and Subtract dropdowns. Note: an option must not appear under both Add and Subtract. If Disabled (NO), they won’t appear on the report.
Overage/Shortage – If Enabled (YES), the amount submitted from cashier at the end of the day will appear on the report. Select one or more options (or Select All) from the Add and Subtract dropdowns. Note: an option must not appear under both Add and Subtract. If Disabled (NO), they won’t appear on the report.
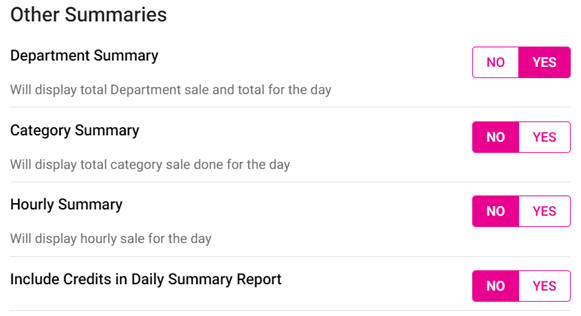
Other Summaries
- Department Summary – If Enabled (YES), the department’s total sales will appear on the report. If Disabled (NO), they won’t appear on the report.
- Category Summary – If Enabled (YES), the category’s total sales will appear on the report. If Disabled (NO), they won’t appear on the report.
- Hourly Summary – If Enabled (YES), the total hourly sales will appear on the report. If Disabled (NO), they won’t appear on the report.
- When all Sales Recap Report settings have been set, click Update at the top-right. The confirmation message ‘Sale Recap Settings Updated Successfully’ appears.
- If the button is greyed out: it means no changes have been made, or that mandatory fields have not been filled in.
Related Articles
Back Office: Additional Report Settings
Sign into the Back Office and select a Store. On the left-side Navigation Panel, click Settings. On the Settings page, under Reports click Additional Settings. The Additional Settings page contains multiple toggles for fields to Enable (YES) to ...
Back Office: Account Balance Report Settings
Sign into the Back Office then select a Store. On the left-side Navigation Panel, click Settings. On the Settings page, under Reports click Account Balance. The Account Balance page contains multiple fields to fill in. Enter a value in each field ...
Credit Card Deposit Amount
Sign into the Back Office. Navigate to Reports —> Sale 3. Select SALE RECAP tab from the Sales Report page. 4. Set the search criteria: Sales Recap Type: Time Period Employee: All Report Type: One Page PDF Time Period: Today, Yesterday, Last N days, ...
Back Office: Payroll Report Settings
Sign into the Back Office. On the left-side Navigation Panel, click Settings. On the Settings page, under Reports click Payroll Report. On the Payroll Report page, 3 tabs appear: Settings, Overtime Settings, and Manage Breaks. Settings Over Time ...
Back Office: Inventory Matrix Report Settings
Sign into the Back Office. On the left-side Navigation Panel, click Settings. The Settings page appears. Under Inventory click Matrix Report Settings. The Matrix Report screen appears. Profit Threshold Amount – (Mandatory) Enter the threshold value ...